Should My Dog Wear Boots on the Trail?
As an Amazon Associate we earn from qualifying purchases. This page contains affiliate links — if you buy through them, we earn a small commission at no extra cost to you.
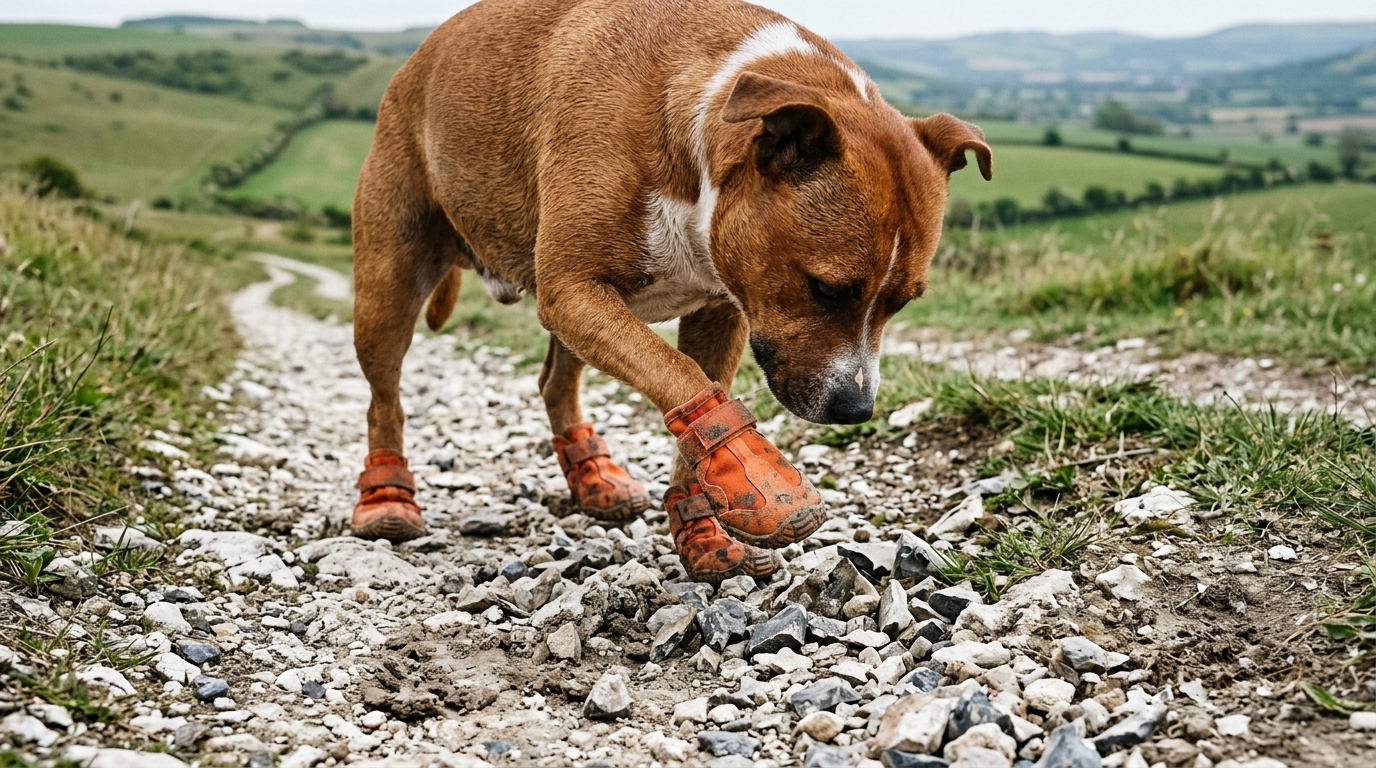
Spotting a fresh cut on your dog’s paw after a muddy scramble up the South Downs usually triggers the same thought: is it time to buy dog boots? Most dogs in the UK don’t need them for standard walks. Whether you’re throwing money at a problem or making a smart purchase depends entirely on the terrain, the season, and how much you’re willing to fuss with the fit.
Do Dogs Actually Need Boots on UK Trails?
The short answer is no, unless you are running on hot summer tarmac, navigating sharp scree, or protecting an existing injury. For soft grass or well-kept footpaths, boots are usually overkill.
UK trails aren’t the soft sand you might picture from holiday brochures. The grit on the South Downs, the sharp stones on the Lake District fells, and the occasional sheep droppings on a boggy path can all turn a pleasant walk into a paw‑damage nightmare. In summer, hot pavement in towns like Brighton can reach temperatures that blister a dog’s pads. Dogs Trust advises testing the tarmac with your own hand—if it’s too hot to hold your hand against it for five seconds, it’s too hot for their paws.
Boots are a reliable barrier against cuts, burns and abrasive grit, and they matter most when the surface is very hot or covered in sharp debris. So, if you’re planning regular runs on gravel tracks, rocky scrambles, or summer city jogs, boots are genuinely beneficial.
The “What” – Types of Boots
There are three main categories you’ll encounter on UK retailers:
- Moccasins (soft booties). Made from stretchy fabric with a thin rubber sole, they’re easy on‑off and work well for short, casual walks. The lightweight design means they don’t trap heat, but they offer limited protection on rough terrain.
- Hard hiking boots. These feature a reinforced rubber sole, often with a waterproof shell. Brands like Ruffwear Grip Trex (set of 2) (paid link) fall into this bucket and are built for long, rocky trails. They add weight and can feel bulky, yet they shield against sharp stones and puddles of mud.
- Socks. A budget alternative that slips over the paw like a thick stocking. While cheap, they tend to slide off during canicross, turning a protective layer into a slipping hazard.
Check Ruffwear Grip Trex (set of 2) price → (paid link)
The choice hinges on the activity. For a weekend hike where you’ll be on uneven ground for hours, hard boots are spot on. For a quick park run, a soft moccasin is usually enough, and a sock should only be considered if you’re watching the price tag and accept the risk of slippage. If you’re unsure what style suits your specific breed, you can always get in touch with our team.
Worth knowing: Boots are a tool, not a universal requirement. Match the gear to the terrain and your dog’s comfort to avoid unnecessary spend.
The “How” – Fitting & Troubleshooting
Sizing makes a real difference. Measure the paw with the toes flat against a ruler; the measurement should include the width of the pad but leave a fingertip’s worth of wiggle room at the toe. Boots bought a size up tend to fall off, while those that are too tight cause chafing.
The slipping fix is straightforward. Most booties use Velcro straps. The trick is to tighten them snugly around the ankle, not loosely so the boot can shift. A common mistake owners make is pulling the strap too far, which actually reduces friction and lets the boot roll off. You want a belt and braces approach: secure enough to stay put, loose enough to let the paw breathe.
Don’t expect a 10‑mile run on day one. Start with a short 500‑metre walk on a soft surface, then gradually increase distance. Building up gradually gives the dog time to get used to the boots.
How to Fit Dog Boots Properly
1. Measure the paw flat
Place your dog’s paw on a piece of paper and press down gently to mimic how it spreads when they walk. Mark the widest points on the left and right, then measure the distance between them.
2. Check the toe clearance
Slip the boot on while your dog is standing. The toes should just touch the front of the boot without being cramped, leaving enough room for the paw to splay naturally.
3. Fasten the straps securely
Pull the Velcro strap tight around the narrowest part of the ankle. It should feel firm but not pinch the leg, ensuring the boot won’t twist during a run.
4. Do a test walk
Have your dog walk a few steps indoors and watch for any lifting at the heel. If the boot slips down or twists sideways, readjust the strap or try a different size.
If the boot lifts, readjust the strap or try a size up. A small amount of adhesive tape on the inner strap can stop a boot from sliding, but only use it as a last‑ditch fix.
The Cons (Heat & Comfort)
Boots aren’t a free‑pass to a perfect trail experience. Dogs sweat through their paws, and a sealed boot can trap heat, causing panting and discomfort on warm days. Several owners have observed that their dogs’ paws get noticeably hotter after a summer run on asphalt, even when the boot’s material is breathable. The PDSA warns that overheating is a major risk for dogs in the UK during summer, so adding thick layers to their paws requires careful monitoring.
Cost is another factor. A decent set of four trail boots typically costs around £50–£90, and you may need a spare pair because boots do go missing in mud. That’s a solid investment, especially if you only use them a few times a year.
Finally, the time factor: putting boots on can be a bit of a faff, especially with an eager, squirming pup. If you’re pressed for minutes before a run, the extra prep time might feel like a nuisance.
Alternatives to Boots
When boots feel like overkill, consider these options:
- Paw wax or balm. Musher’s Secret is a popular, budget‑friendly choice that creates a slick barrier against grit and moisture. A thin coat reduces mud sticking between the toes, and it’s easy to reapply after a walk.
- Regular nail trimming. Short nails prevent snagging on rocks and reduce the risk of cuts. A quick clip after each hike keeps the paws in good shape.
- Thorough cleaning. Wiping paws with a damp cloth after a muddy trek removes abrasive particles that could cause abrasions later. This simple step is often the first line of defence for many UK hikers.
These alternatives are especially useful on soft grass, well‑maintained footpaths, or during cooler months when overheating isn’t a concern. You can read more about routine dog care in our blog index.
Boot Type Comparison
| Boot Type | Best For | Protection Level |
|---|---|---|
| Soft Moccasins | Short casual walks | Low (grit only) |
| Hard Hiking Boots | Long rocky trails | High (stones, mud) |
| Paw Wax/Balm | Budget or soft ground | Medium (moisture) |
| Dog Socks | Indoor use only | Low (slipping risk) |
Comparison table showing protection levels for Soft Moccasins, Hard Hiking Boots, Paw Wax/Balm, and Dog Socks.
Ready to Start?
The decision matrix is simple:
- Hot pavement or gritty, rocky trails? Go for hard hiking boots.
- Short, casual walks on soft ground? Soft moccasins will do.
- Budget‑tight or occasional use? A well‑applied paw wax can be enough, provided you keep the nails tidy and clean the paws after each outing.
Boots are a tool, not a universal requirement. By matching the gear to the terrain and your dog’s comfort, you avoid unnecessary spend and keep those paws happy.
With that in mind what to look for, the next logical step is to make sure you’ve covered every detail before you buy. Get the Free Canicross Starter Checklist – it’s a handy reference for any outdoor activity, ensuring you don’t miss a beat when planning your next adventure. You can also read about the Mud and Paws Team to see how we review our outdoor gear.
Happy trails, and may your dog’s paws stay clean, cool and injury‑free.
Related Guides
For a complete overview, see our Essential Dog Trail Gear UK: What to Pack.
As an Amazon Associate we earn from qualifying purchases.
Note: This information is for general guidance only. Always verify specific health and safety advice with a qualified professional or official source.